Create prompt sessions
- A session saves all parts of the playground state including variable values, conversation messages etc. When leaving without saving, you’ll receive a prompt to save or discard changes.
-
Save an ongoing session using the
save sessionbutton in the prompt header. Unsaved sessions are marked with a red asterisk beside their name. Each saved session includes a timestamp and creator details.

- View the list of recent sessions by clicking on the arrow next to the
save sessionbutton and see complete list using the button at the bottom of this list.
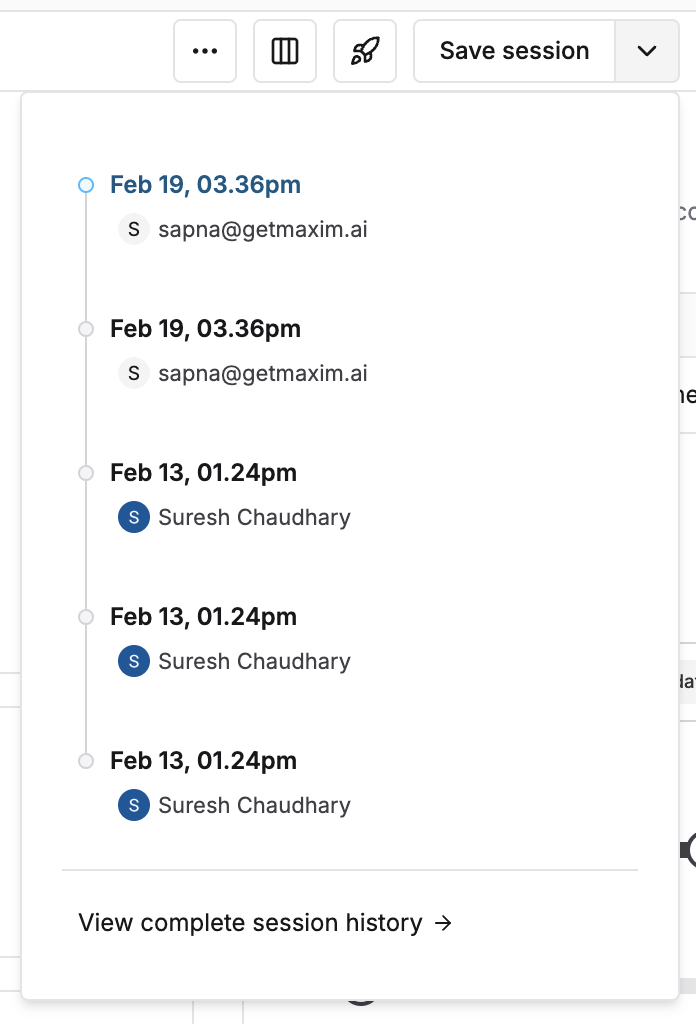
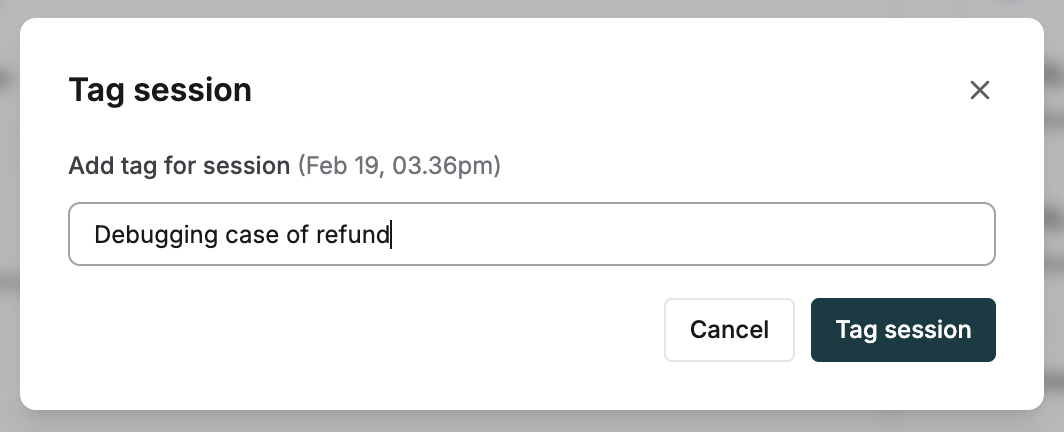
- To make organization and recall easier, tag your sessions by clicking the
tagicon that shows on hover of a session list item. Add a name that provides information to other team members about the use of that session.
Save sessions quickly using Cmd+S ( Mac) or Ctrl+S (Windows/Linux).
Resolve prompt session conflicts
This feature is currently in beta. Please reach out to us on contact@getmaxim.ai if you’d like to try it out.
- Messages: Content and attachments in conversation messages
- Variables: Prompt variables and their bindings
- Model: Selected model and provider
- Tools: Attached tools and agent mode settings
- Configuration Parameters: Model parameters like temperature, max tokens, etc.
- Response Format: Structured output settings
When Conflicts Are Detected
Conflicts are automatically detected when:- You’re editing a prompt session
- Another user makes changes to the same prompt session
- The sessions have conflicting changes that can’t be automatically merged
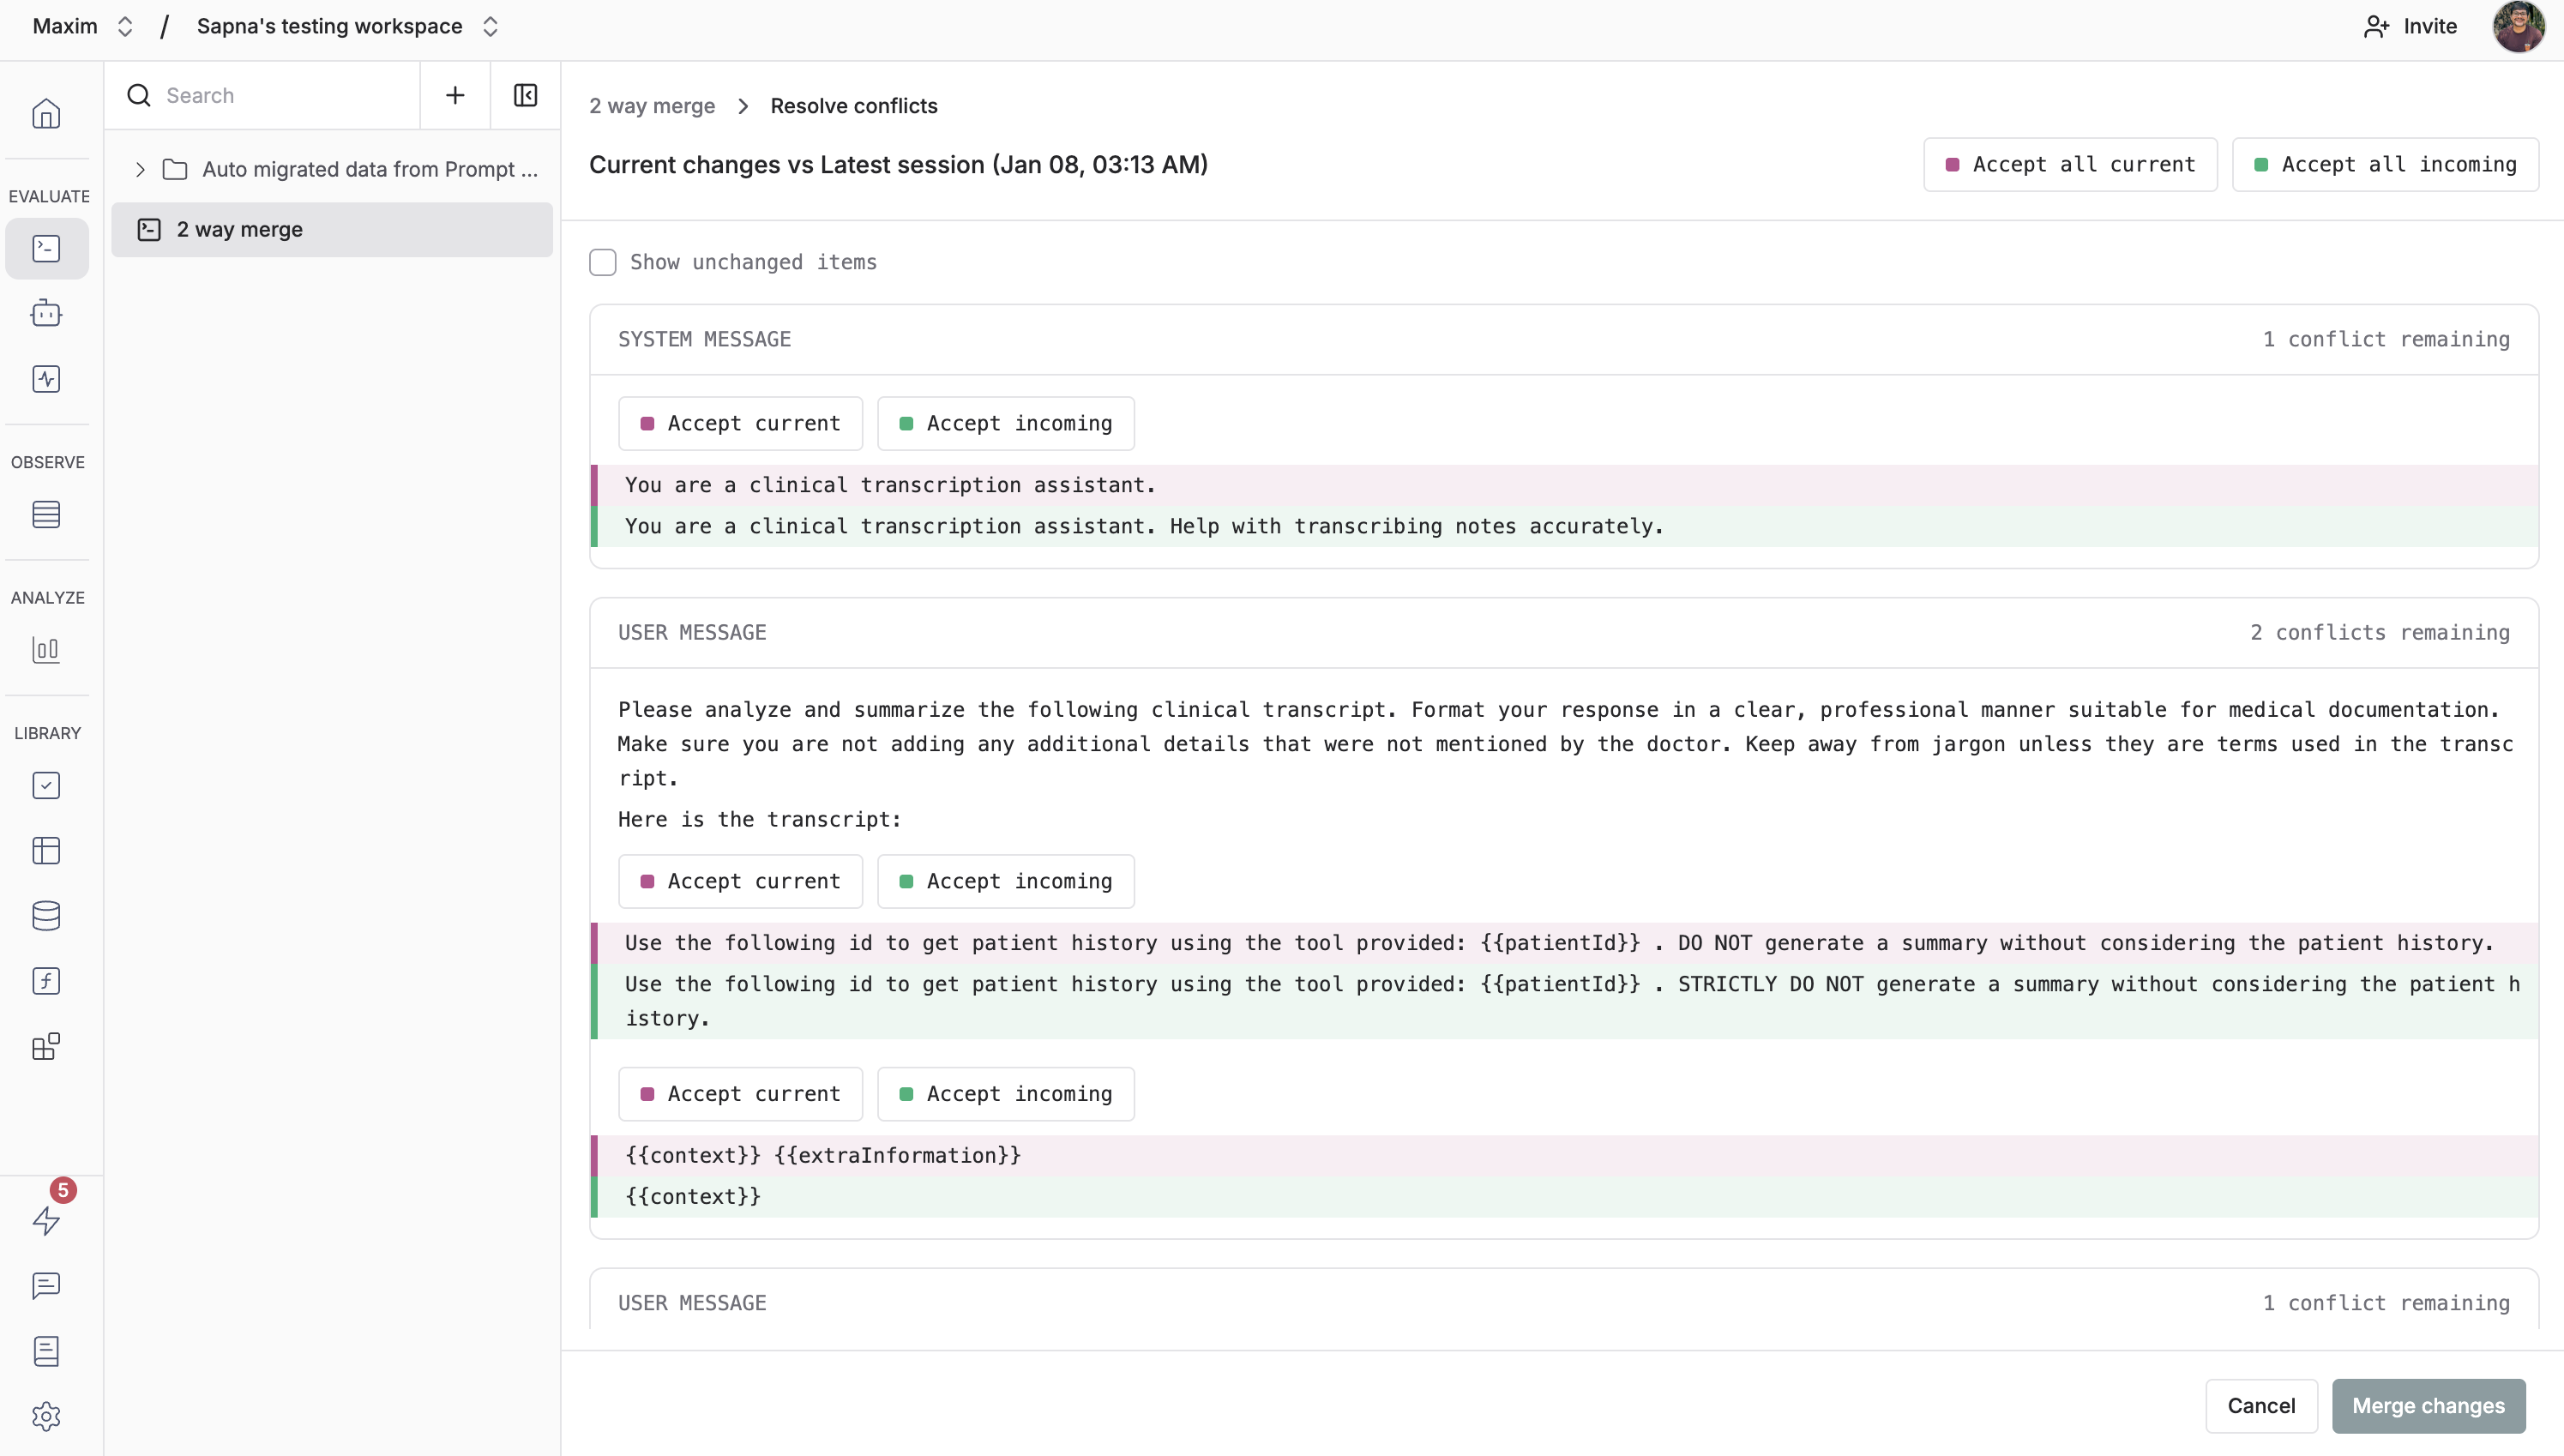
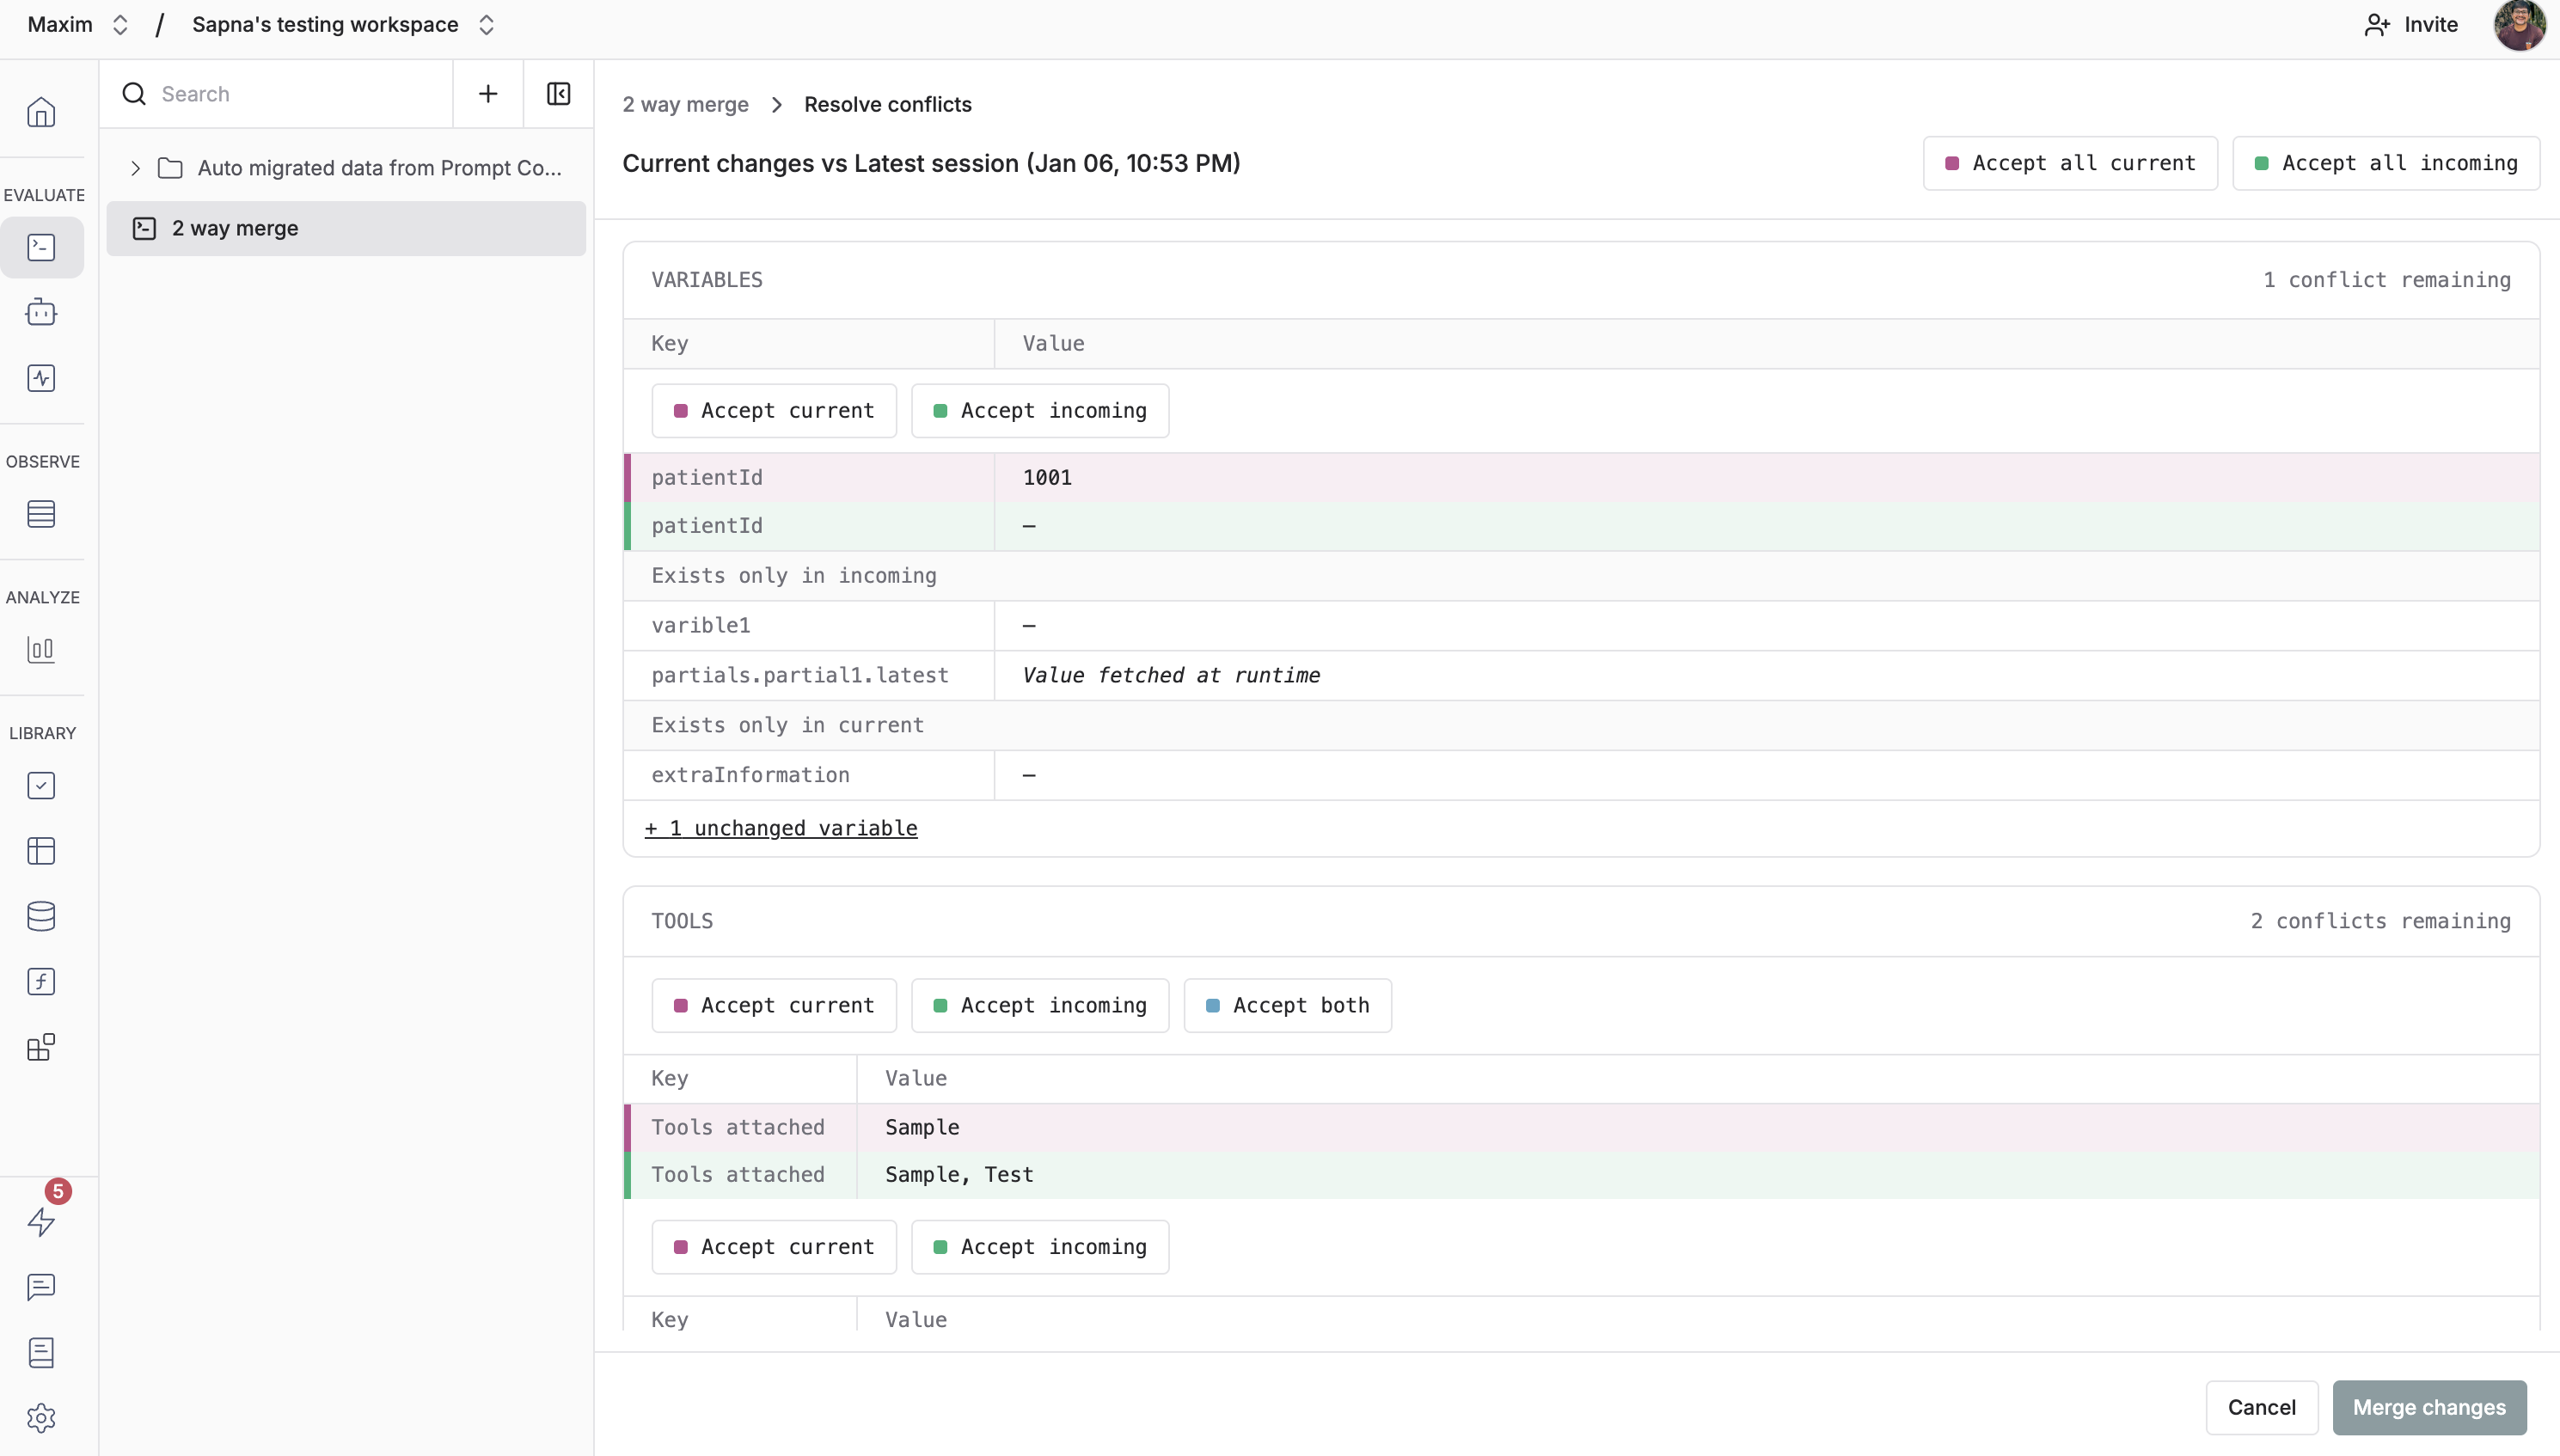
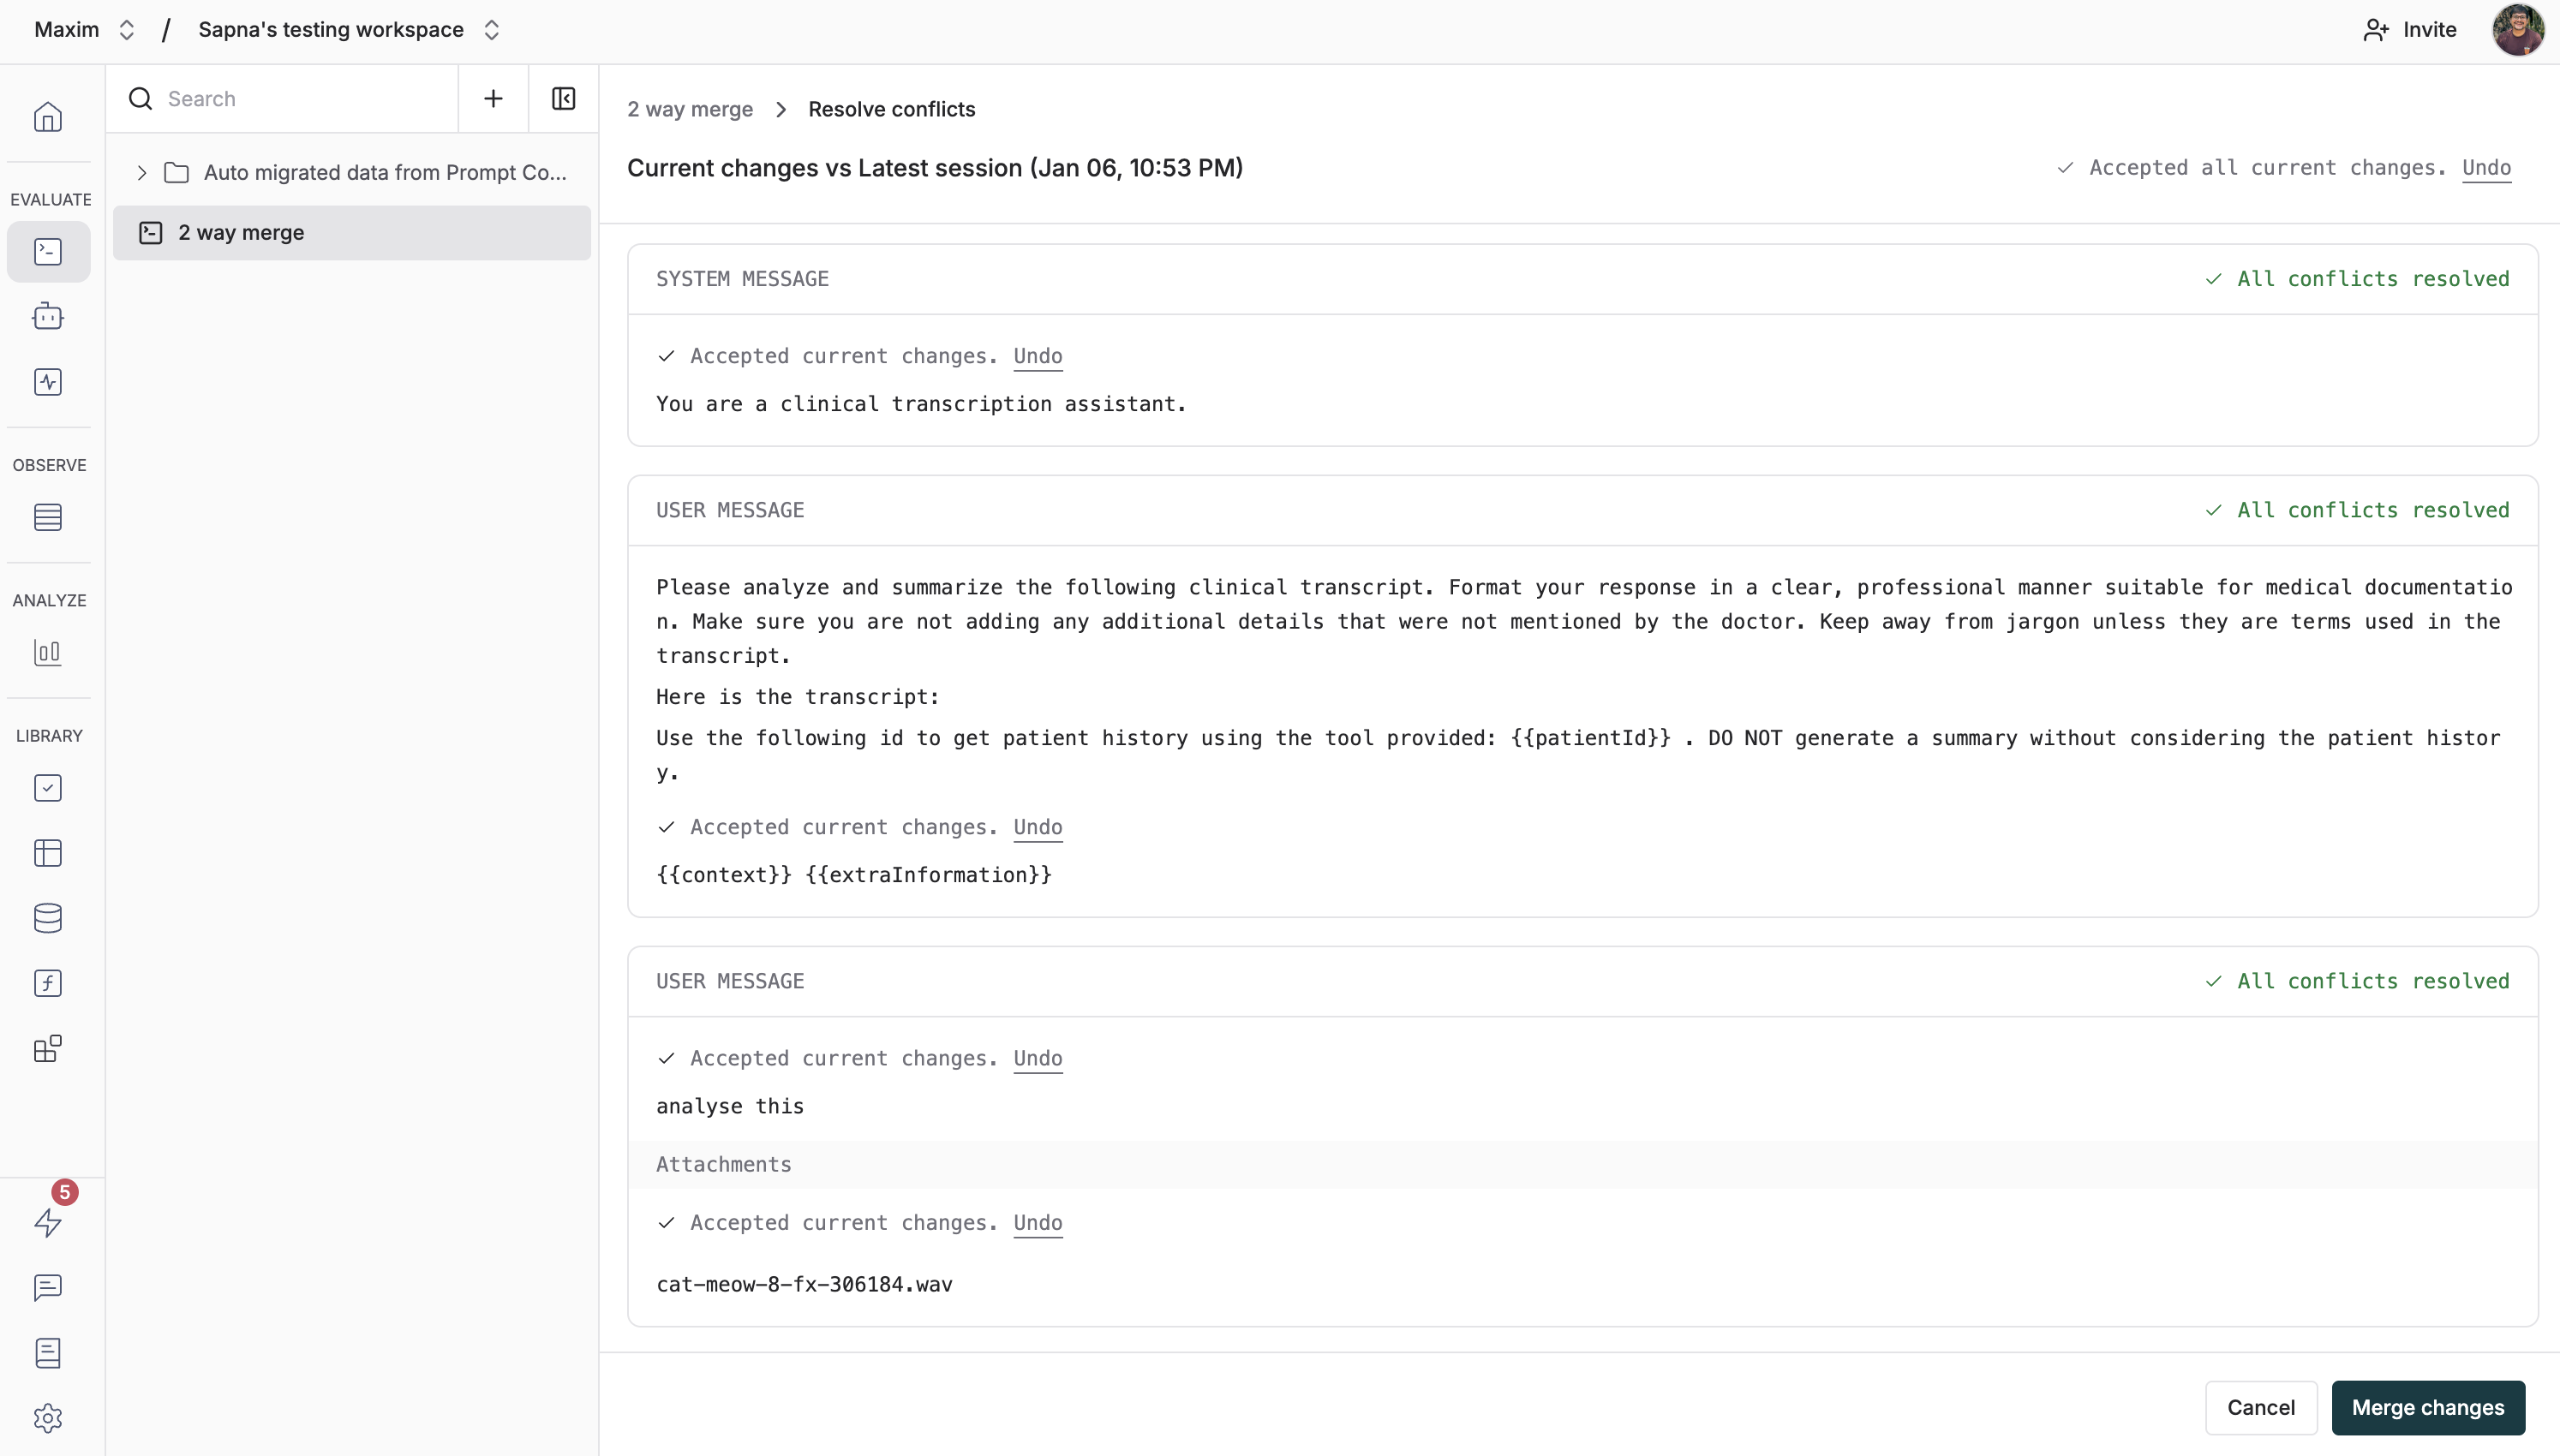
Understanding the Merge Interface
The merge interface shows conflicts in a unified view with clear visual indicators:- Your changes (Current): Shown in pink/magenta - these are your current edits
- Incoming changes: Shown in green - these are from the latest session’s changes
- Conflict badges: Show how many unresolved conflicts remain in each section
Navigate to Conflict Resolution Icon
When conflicts are detected, you’ll see a notification in the header, next to the title of the prompt. Click on the notification and then click on the “Resolve conflicts” button.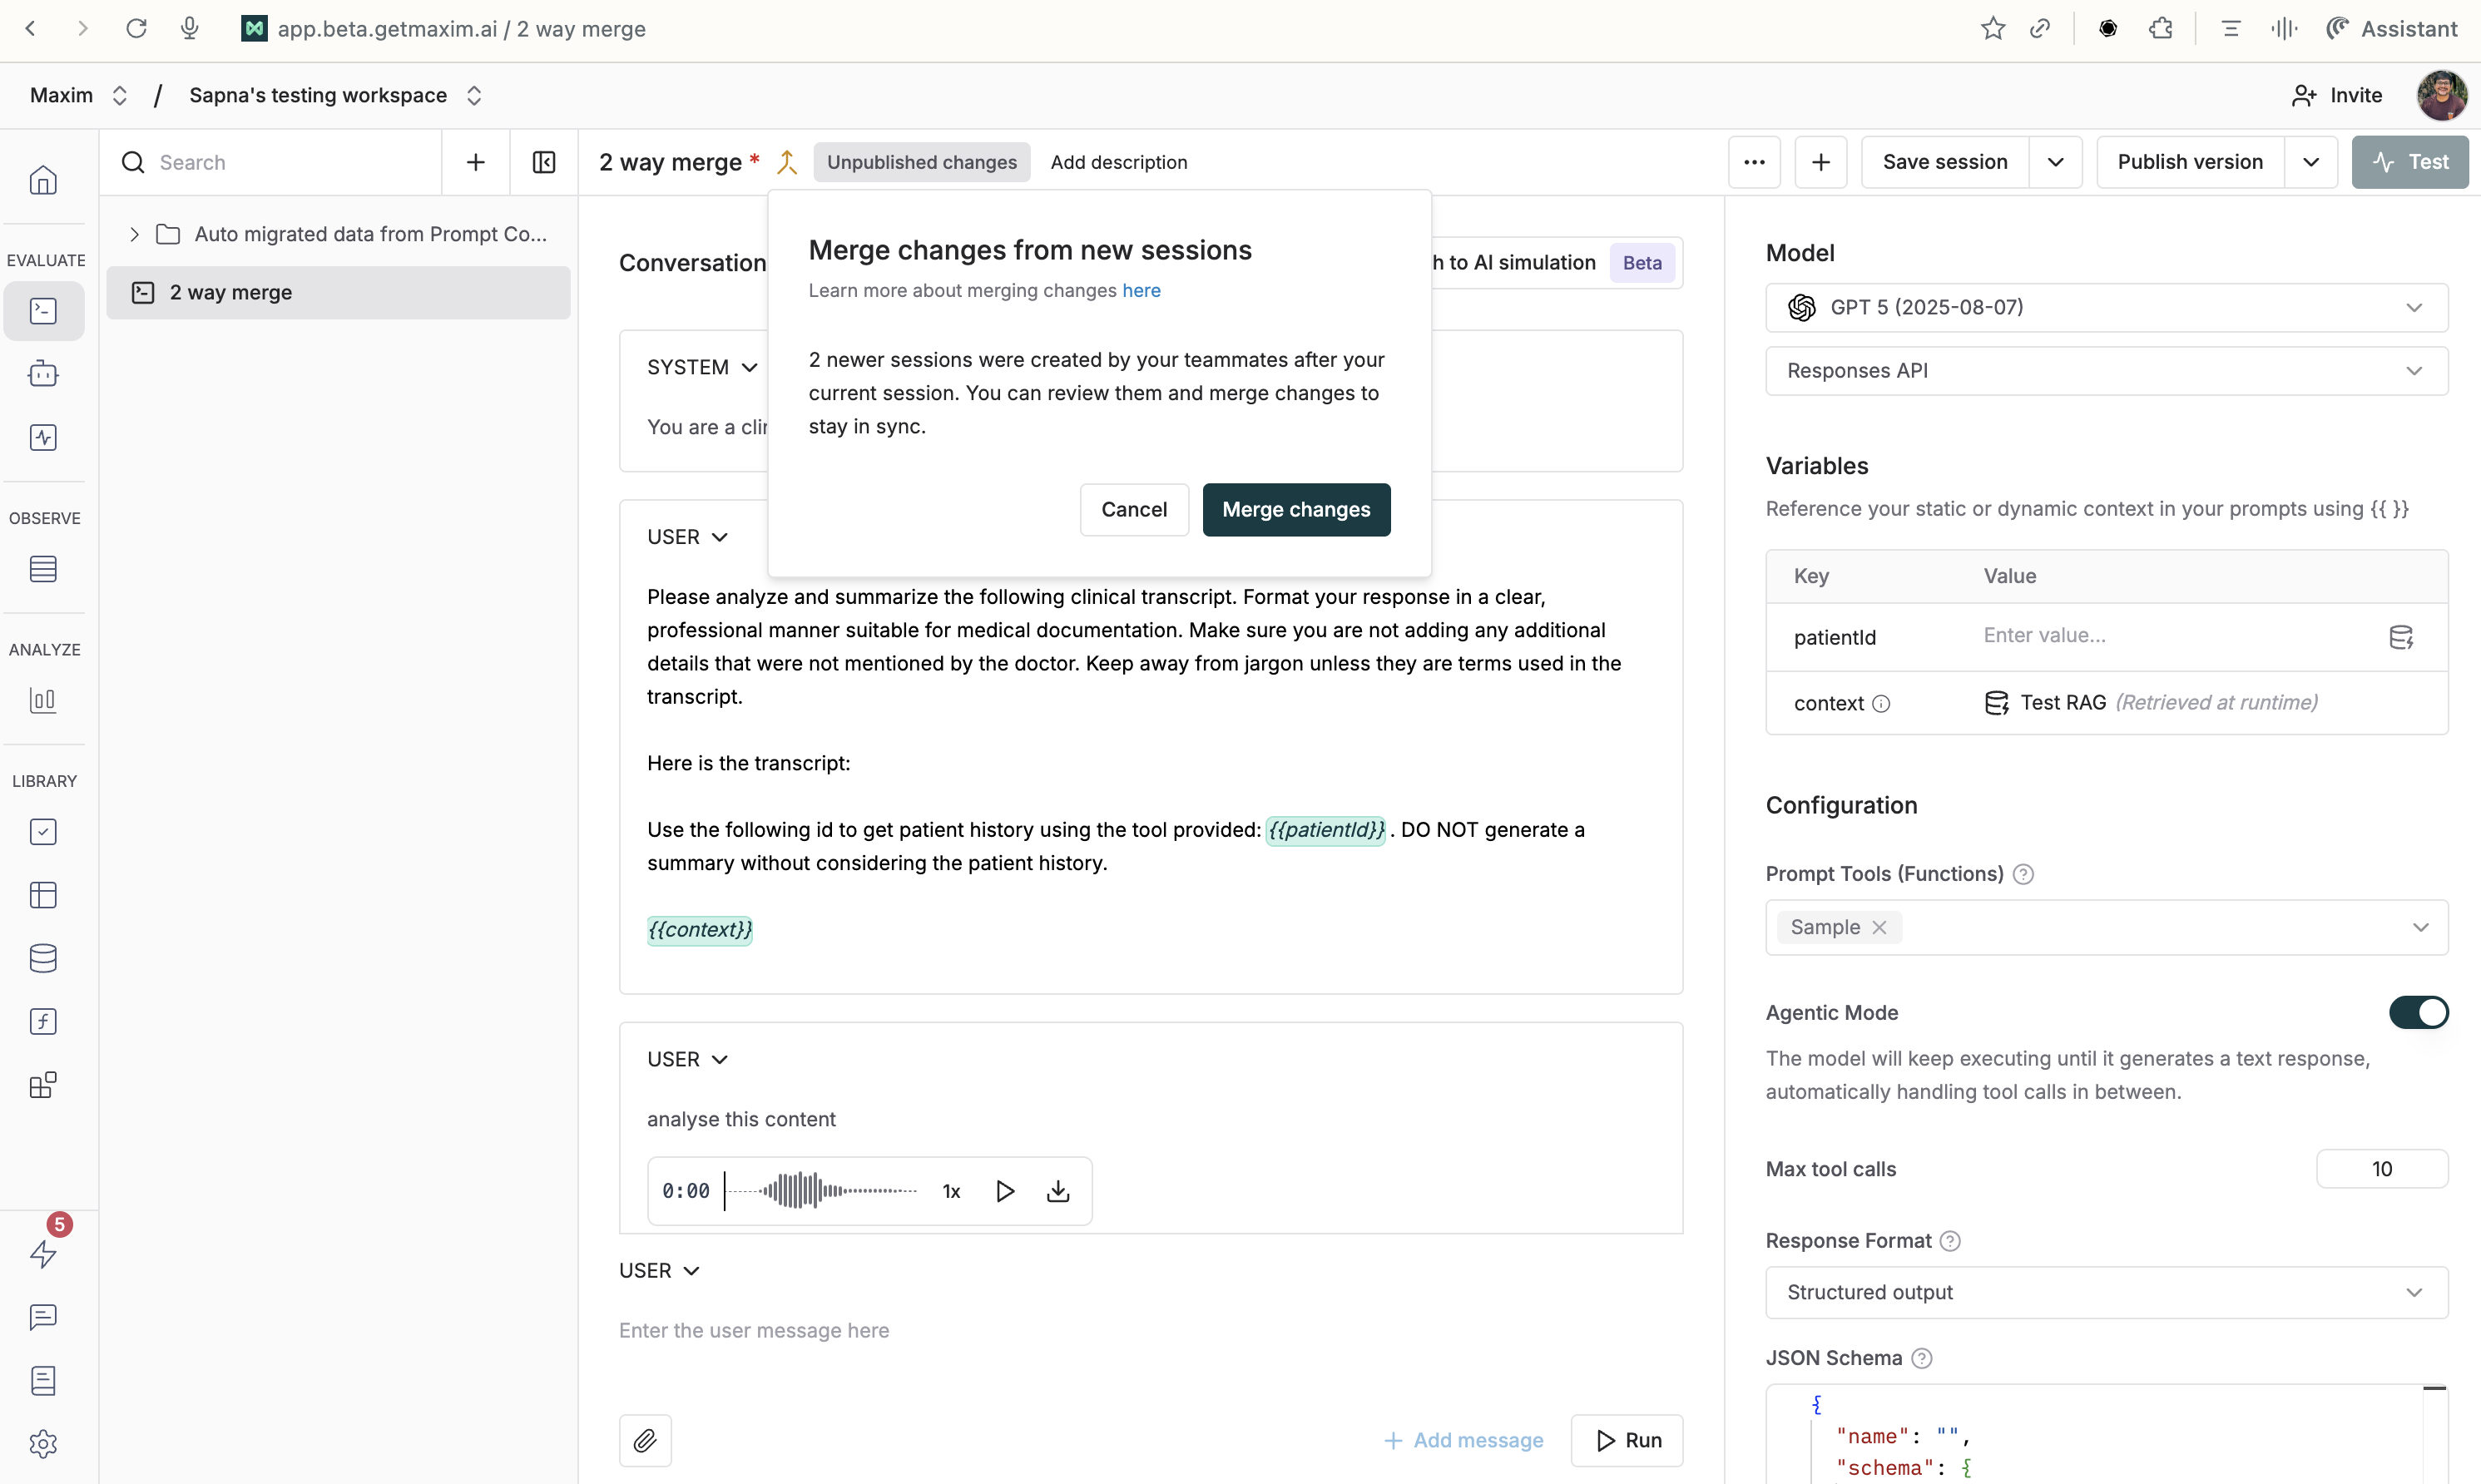
Review Conflicts by Section
The merge interface organizes conflicts into clear sections. Review each section to understand what has changed:Messages Section
Each message in your conversation is compared. Conflicts can occur in:- Message content: Different text in the same message position
- Attachments: Different files attached to messages
Variables Section
Variables are compared by their keys. You’ll see:- Variables that exist in both sessions with different values
- Variables that only exist in your session
- Variables that only exist in the incoming session
Model Section
If different models or providers are selected, you’ll see a conflict here.
Tools Section
Conflicts in tools include:- Tools attached: Different sets of tools
- Agent mode: Enabled/disabled state differences
- Max tool calls: Different limits set
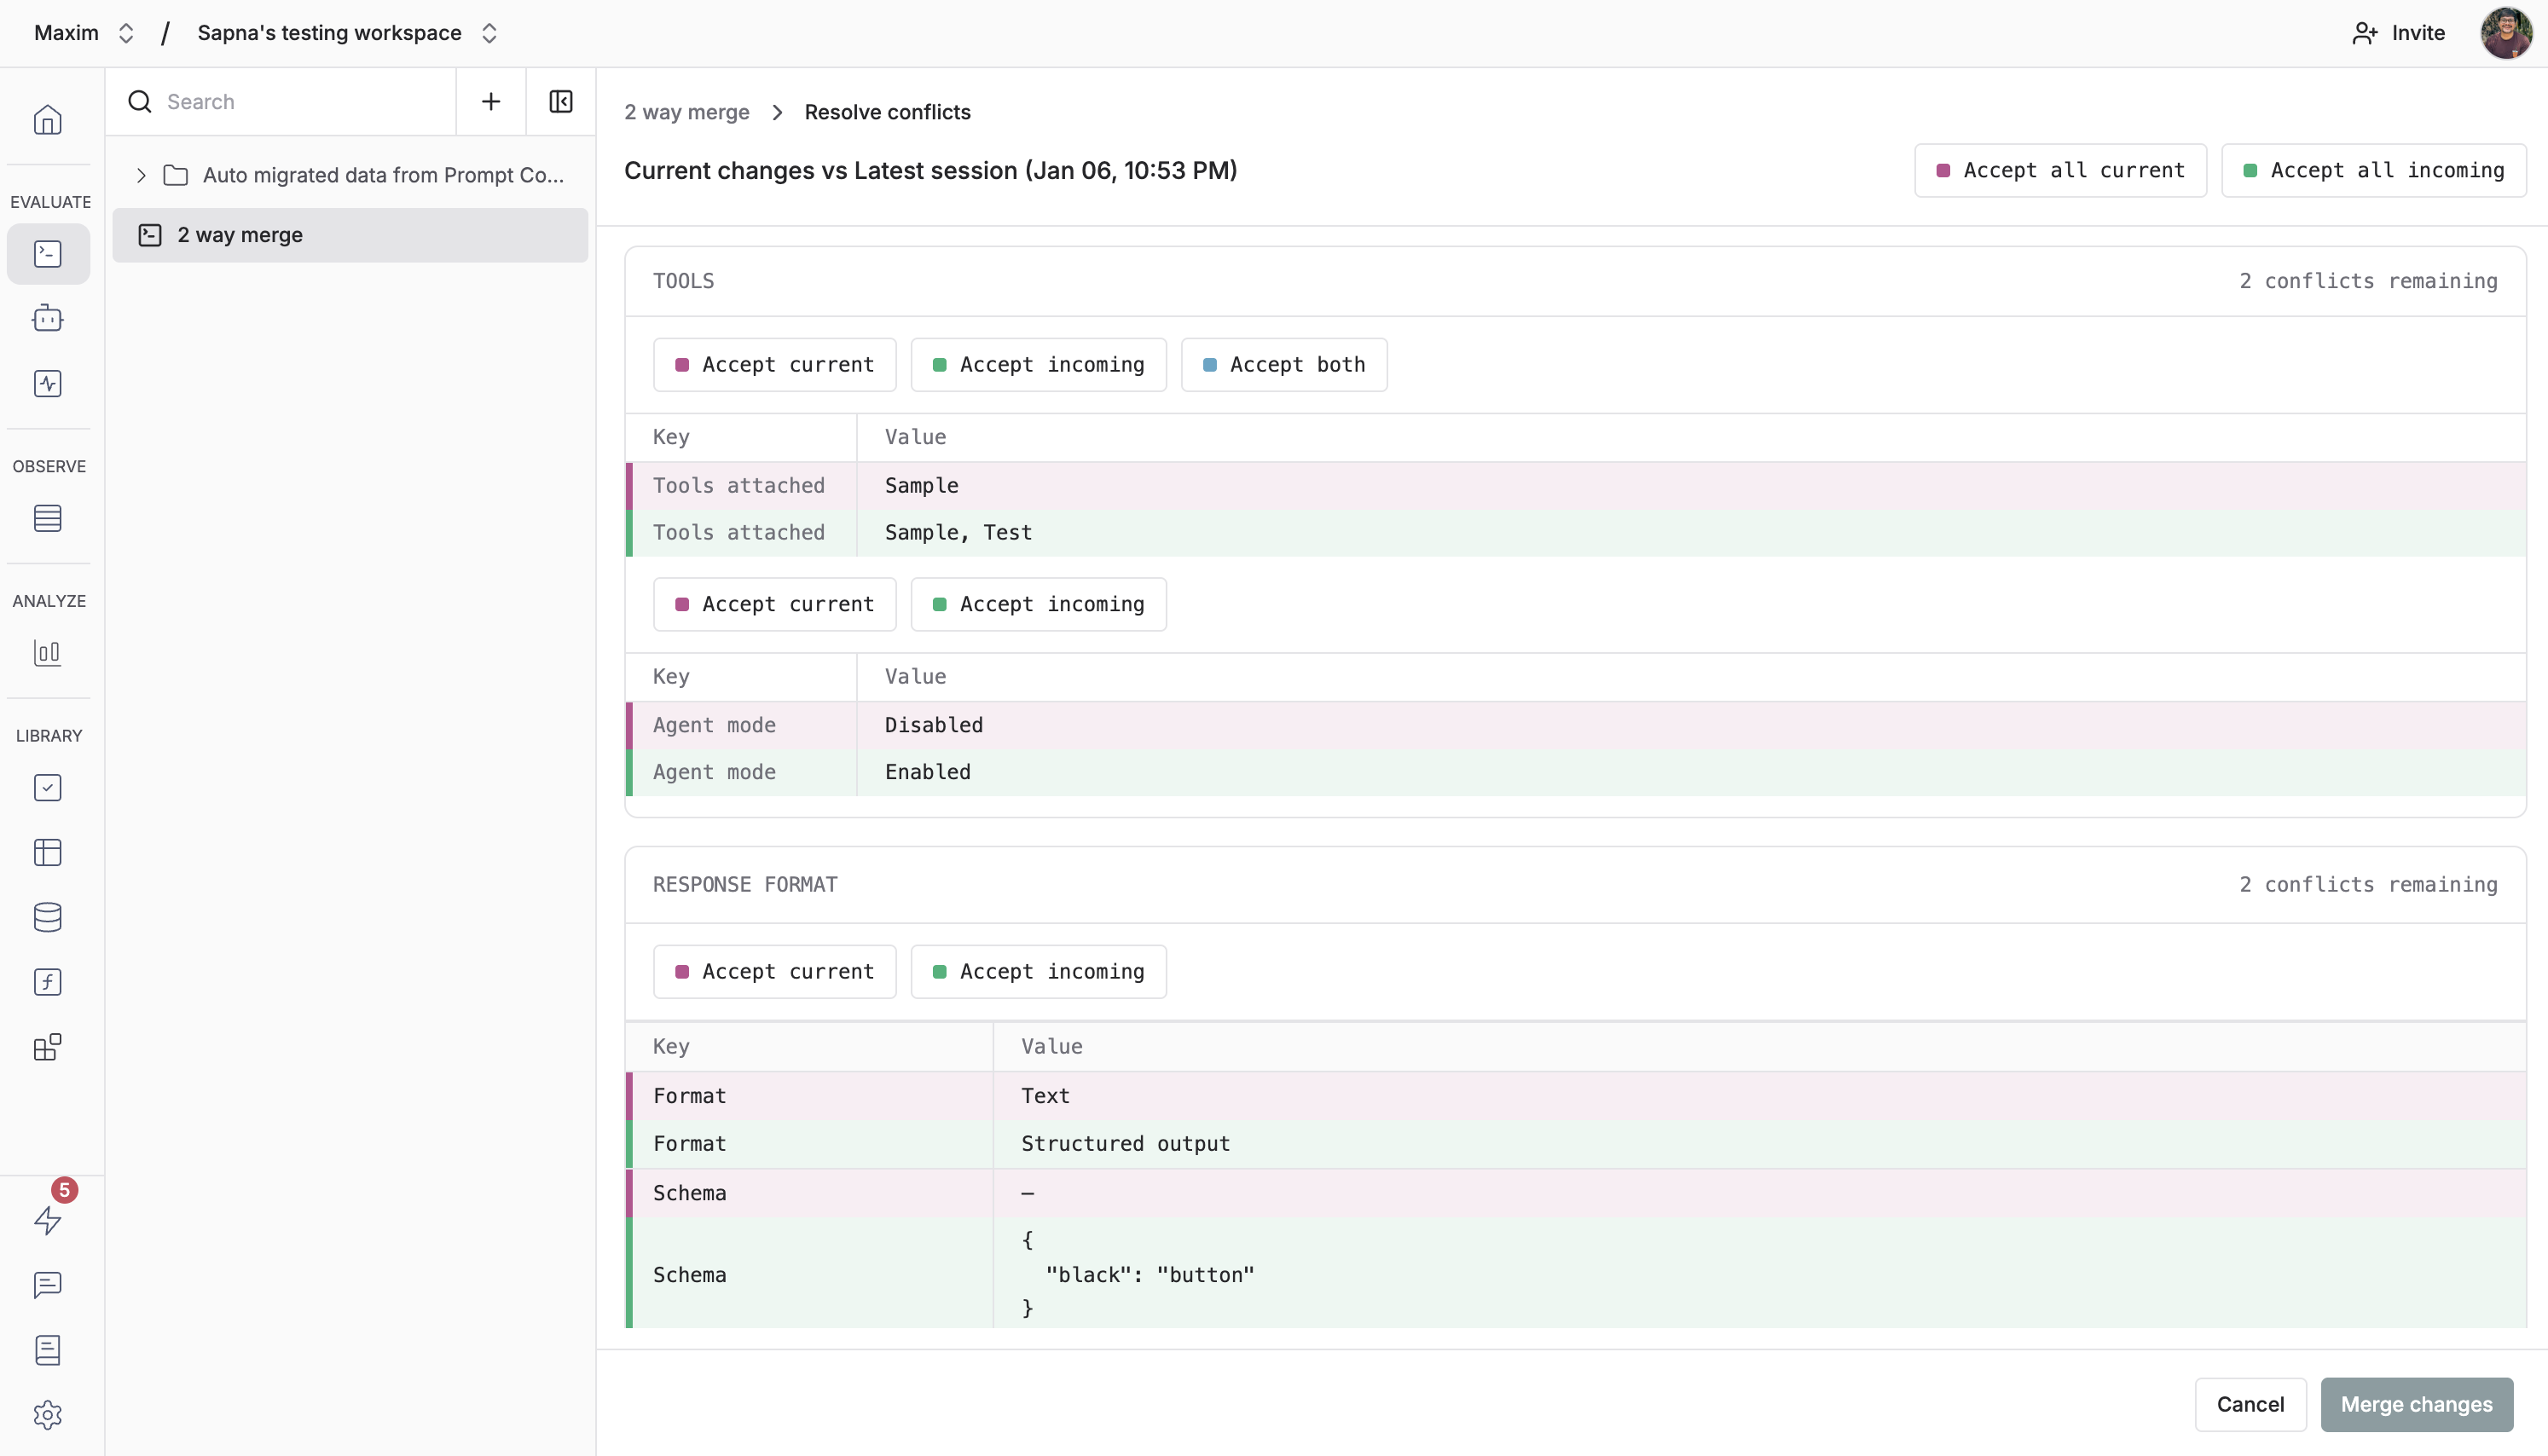
Configuration Parameters
Model parameters like temperature, max tokens, top_p, etc. are compared individually.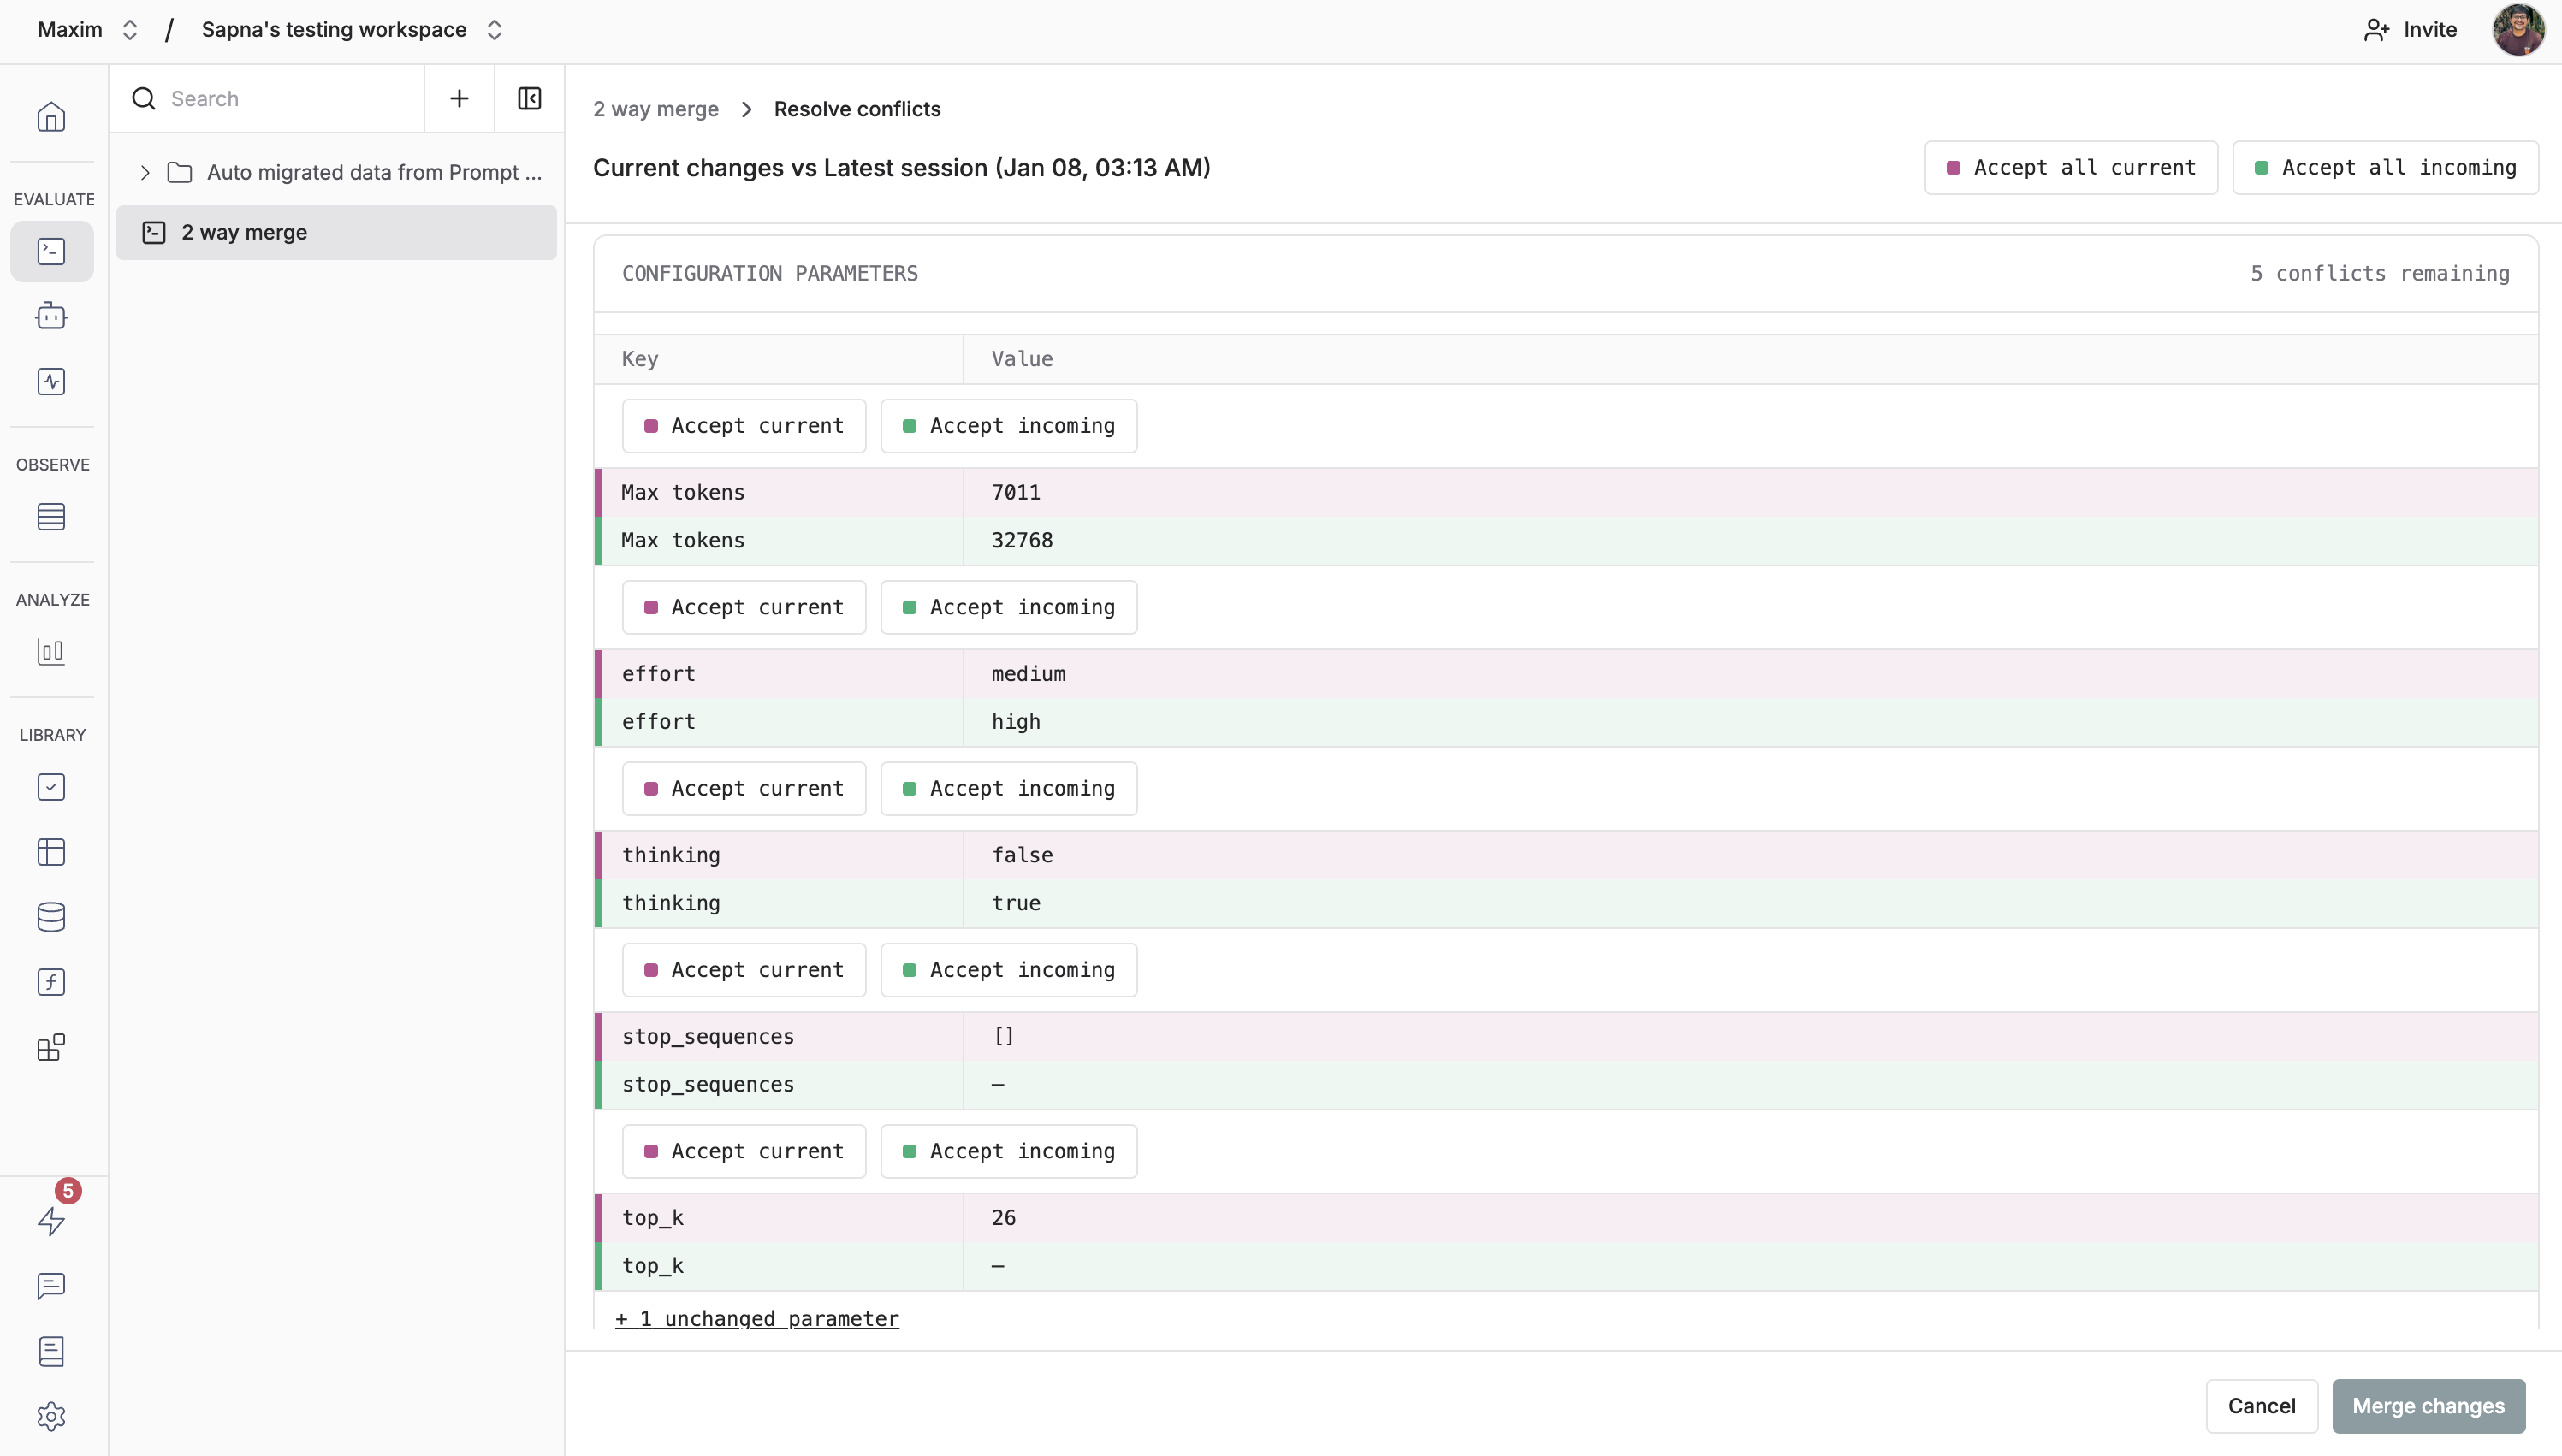
Resolve Individual Conflicts
For each conflict, you have two options, along with the option to accept both where applicable: Accept Current (Your Changes) Keep your version of the change. Click the “Accept current” button. Accept Incoming (Latest Session) Use the version from the latest session. Click the “Accept incoming” button. Accept Both (When Available) For some conflicts (like tools or attachments), you can accept both versions. This combines elements from both sides. Click the “Accept both” button.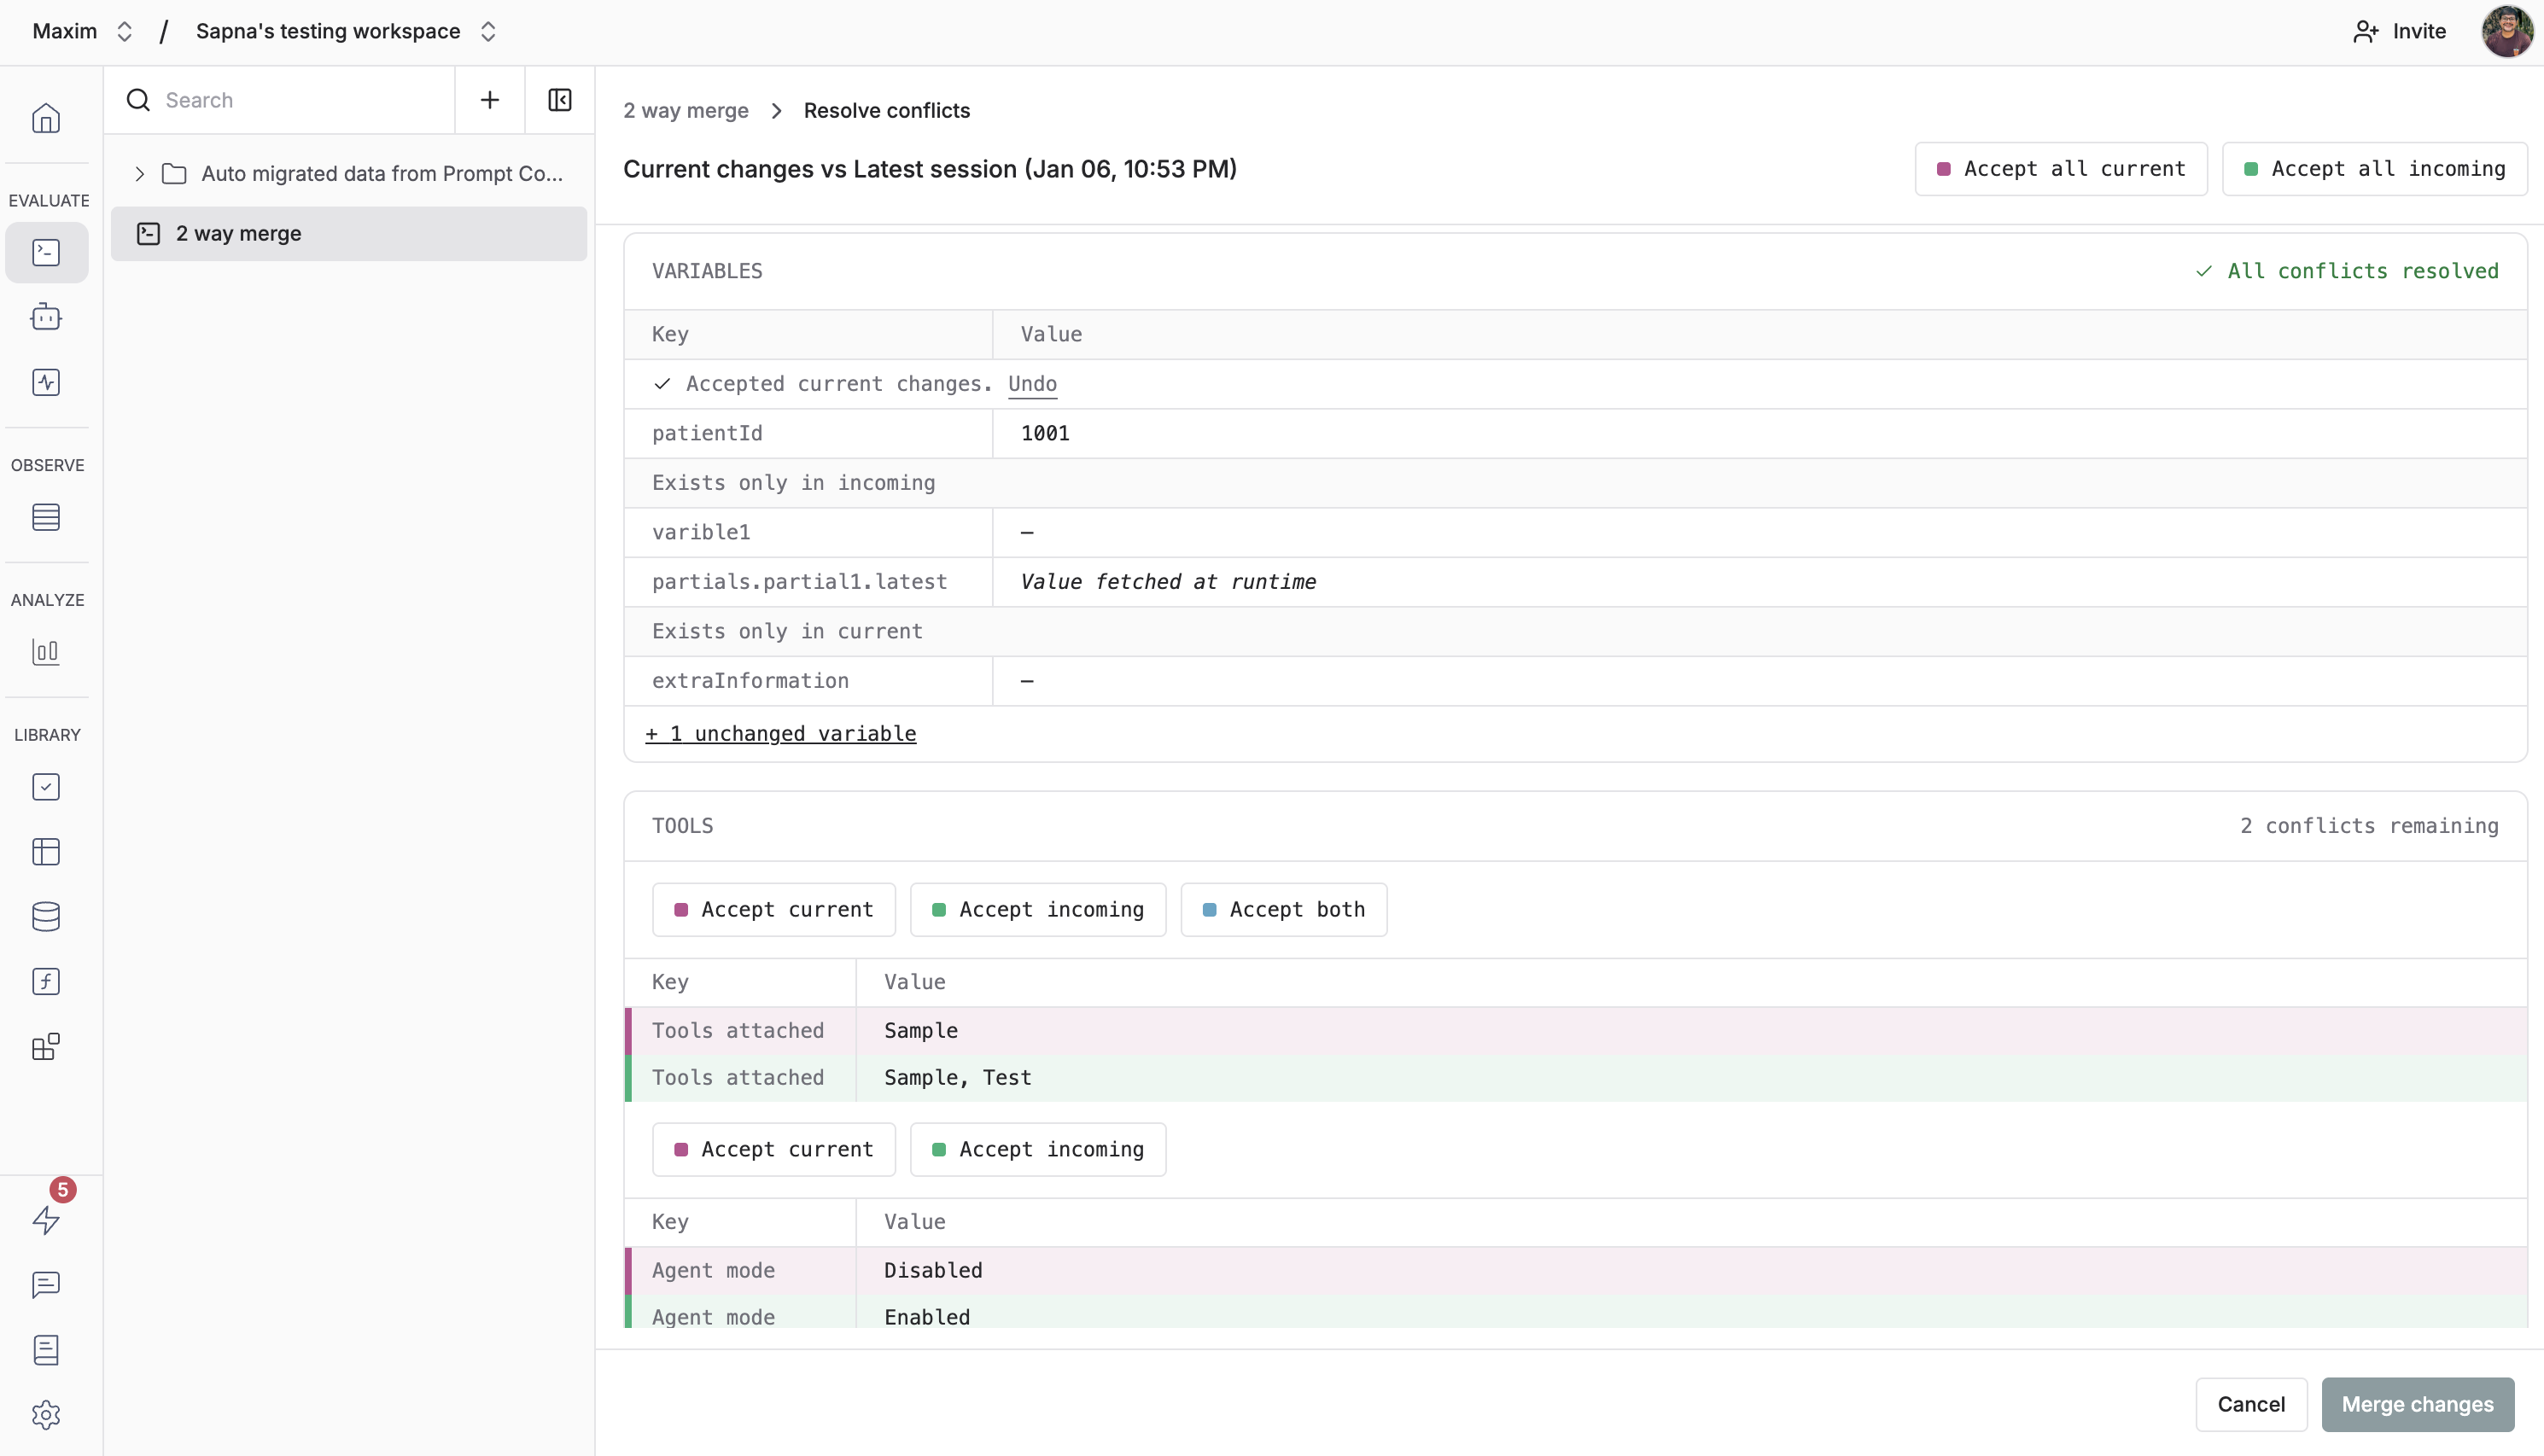
Use Bulk Actions (Optional)
If you want to accept all changes from one side, use the bulk action buttons:- Accept all current: Resolves all conflicts in favor of your changes
- Accept all incoming: Resolves all conflicts in favor of the latest session
After using a bulk action, you can still adjust individual conflicts. Click “Undo” next to the bulk action notification to revert the bulk action and resolve conflicts individually.
Review Resolution Status
As you resolve conflicts, watch the conflict count in each card. Each card shows how many conflicts remain.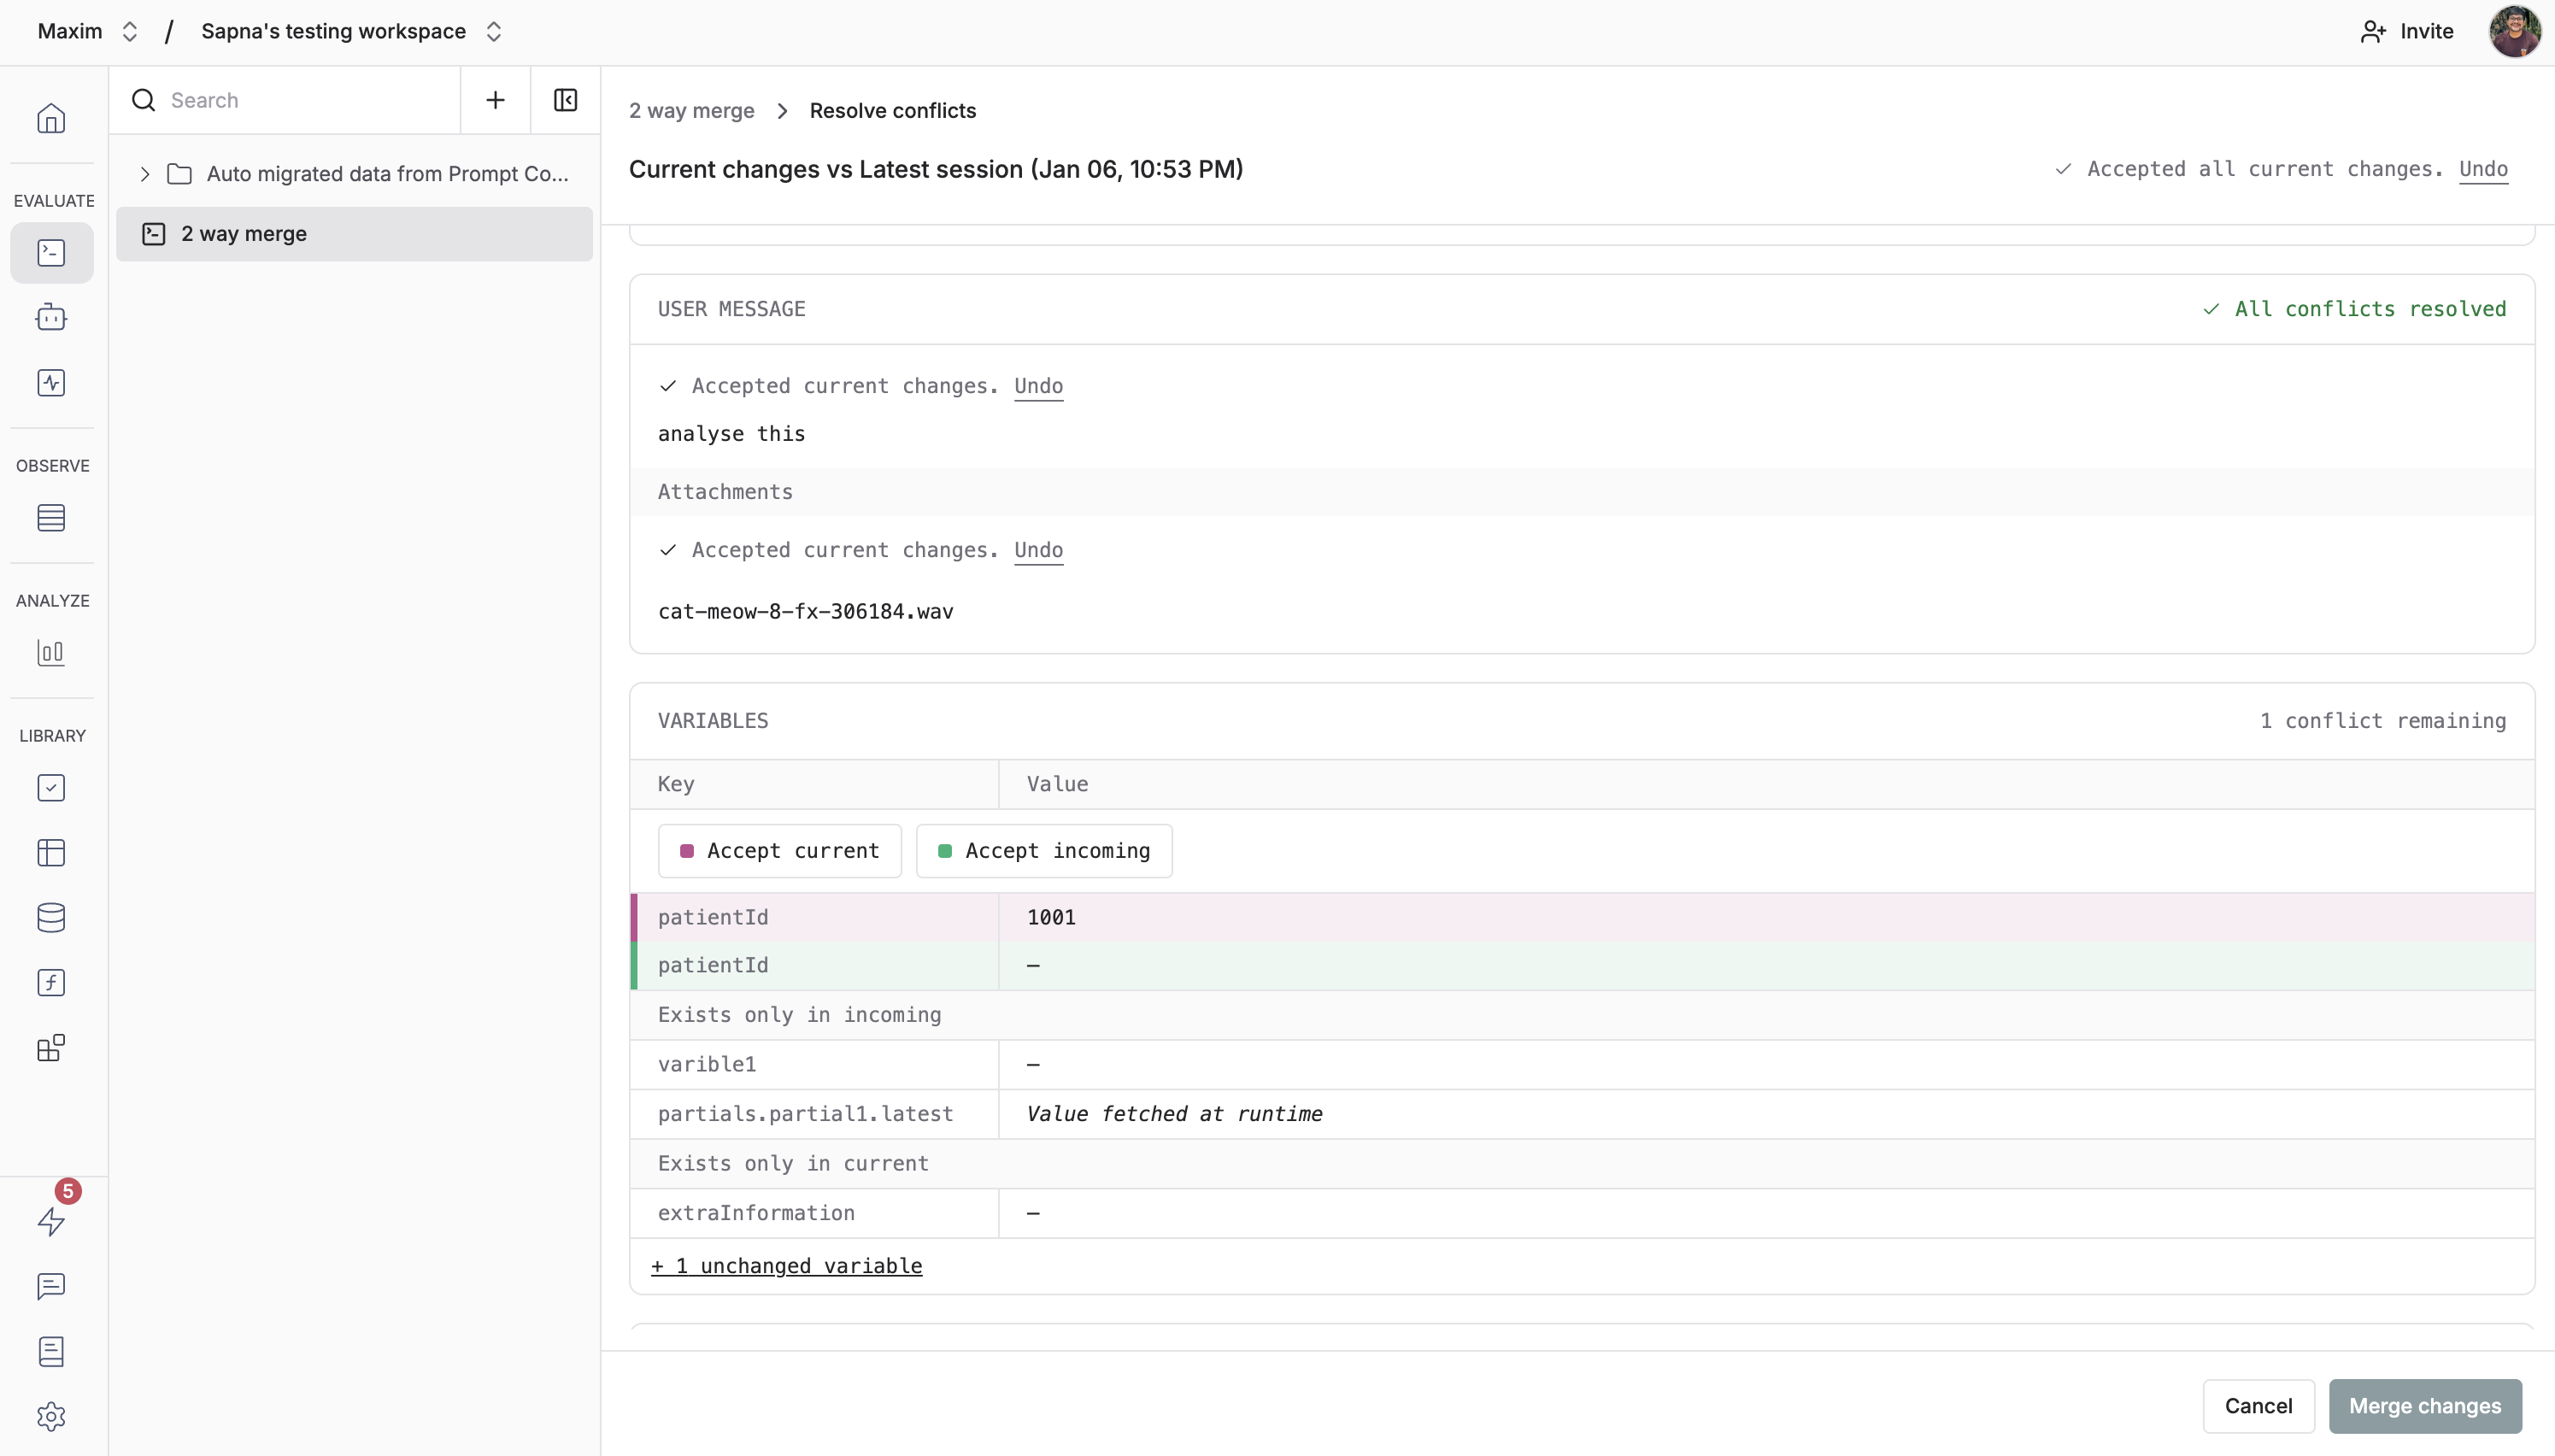
Complete the Merge
Once all conflicts are resolved:- Click on the “Merge changes” button to create the merged session
- You’ll be redirected to the new merged session
The merge creates a new session that combines your changes with the incoming changes based on your resolutions. Your original session and the incoming session remain unchanged. You can use the session drop down to navigate between sessions.
Show Unchanged Items
By default, the merge interface only shows conflicts. To see all items (including those without conflicts), check the “Show unchanged items” checkbox. This is useful when you want to:- Verify that certain items are indeed unchanged
- Get a complete view of the session comparison
- Understand the full context of changes